Creating Product Rules
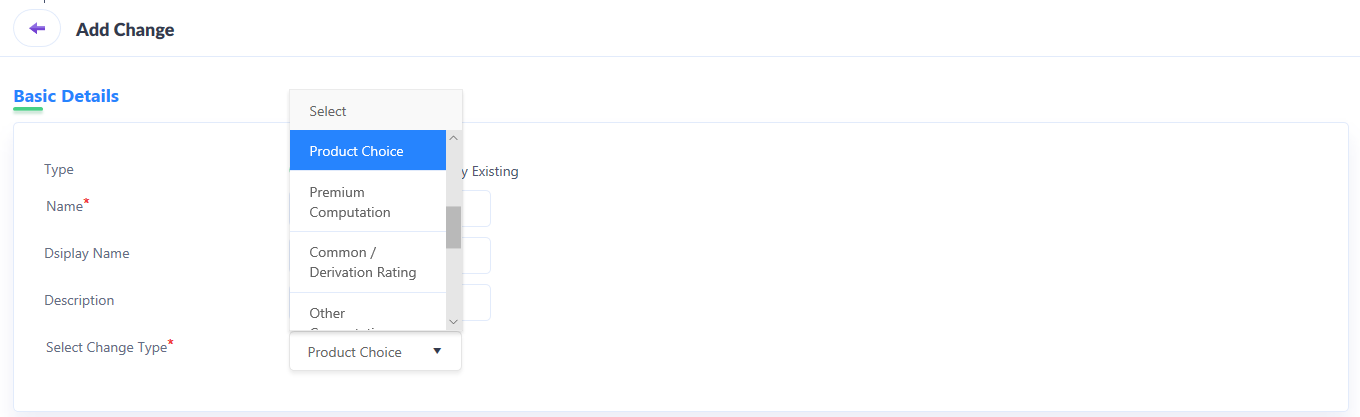
The methodology for creating Product Rules is the same as Risk. However, to create Product Rules, choose Co-exquisite rules/Offer/Decline Rules/Eligibility Rules/Mutually Exclusive Rules in the Change Type drop-down as appearing under Basic Details.
Adding Product Rules
a) Free Flow Rule
1. To add a new product rule, first create a Product Rule change type.
2. Upon successfully creating a Product rule (Co-exquisite rules/Offer/Decline Rules/Eligibility Rules/Mutually Exclusive Rules), the same appears in the list of changes within a workspace.
3. Click on the edit option as seen in the column of the Product Rule created.

4. In the new window that appears, under Basic Details, provide information into the following fields.
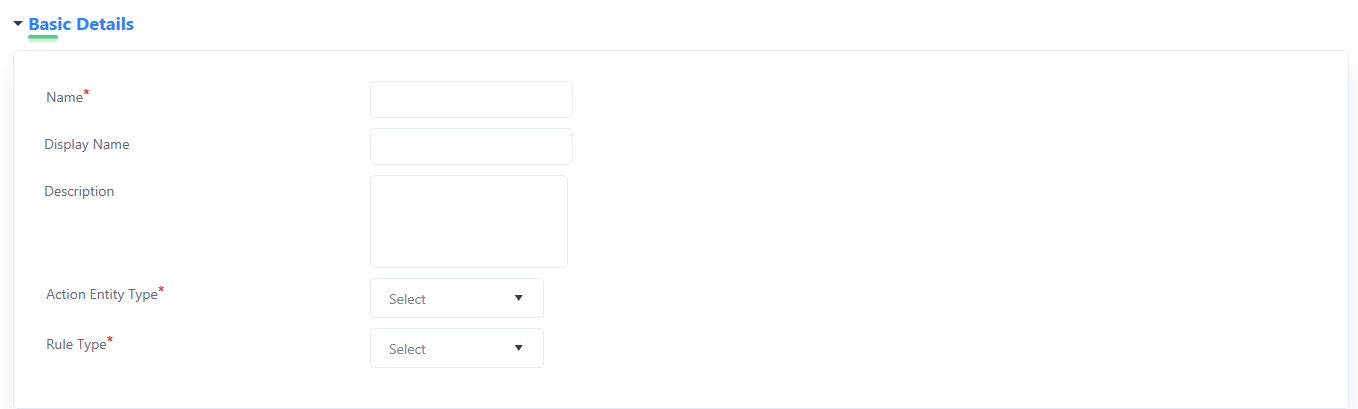
a) Name: The name of the Product Rule as provided while creating one is shown here by default and cannot be edited.
b) Display Name: The display name of the Product Rule as provided while creating one is shown here by default and cannot be edited.
c) Description: A generic description pertaining to the Product Rule can be included here.
d) Action Entity Type: The action type entity of the Product Rule as provided while creating one is shown here by default and cannot be edited.
e) Rule Type: Choose Free Flow rule from the drop-down list.
f) Type: Select the applicable Change Type
g) Context: Depending on the selection made above in Type, choose the applicable context for the same.
5. Under Rule Data section, click on ‘+’ to add new Rule Data.

6. Clicking on the ‘+’ icon as mentioned in the previous step creates a new column where the following details must be provided.
Operator: From the list of operators shown, such as >, <, <=, >=, =, !=, IN, NOTIN, select the applicable.
Adjusted Broad Rate: Input the desired adjusted broad rate.
Operator: From the list of operators shown, such as >, <, <=, >=, =, !=, IN, NOTIN, select the applicable.
Agreed Value Option: Input the desired adjusted broad rate.
Coverage: Choose the applicable Coverage.
Parent Path: Choose the applicable parent path.
7. Click on Save to complete the process of adding a free flow rule.
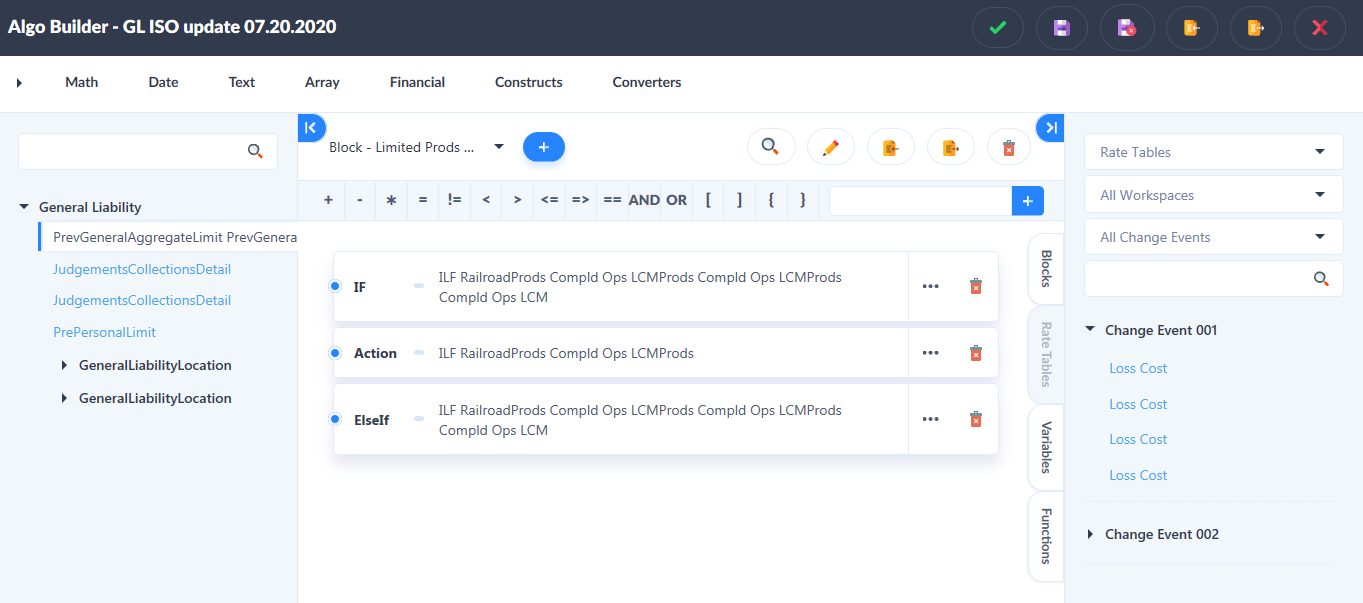
8. Click on Proceed to Builder to configure the Product Rule using the Algorithm builder.
-
Access the attribute against which `algorithm needs to be written from the left section. Double click to select an attribute.
-
Access the function library from the top of the algorithm builder.
-
Access the various rating steps or rate tables from the right side of the builder.
9. Once the configuration on the Algorithm Builder has been completed, click on Submit.
10. Navigate back to the Add Product Rule page and click on Save.
b) Decision Table
1. To add a new product rule, first create a Product Rule change type.
2. Upon successfully creating a Product rule (Co-exquisite rules/Offer/Decline Rules/Eligibility Rules/Mutually Exclusive Rules), the same appears in the list of changes within a workspace.
3. Click on the edit option as seen in the column of the Product Rule created.
4. In the new window that appears, under Basic Details, provide information into the following fields.
a) Name: The name of the Product Rule as provided while creating one is shown here by default and cannot be edited.
b) Display Name: The display name of the Product Rule as provided while creating one is shown here by default and cannot be edited.
c) Description: A generic description pertaining to the Product Rule can be included here.
d) Action Entity Type: The action type entity of the Product Rule as provided while creating one is shown here by default and cannot be edited.
e) Rule Type: Choose Decision Table from the drop-down list.
5. Under the Decision Drivers section, click on the ‘+’ icon to add new decision drivers.

6. Clicking on the ‘+’ icon creates a new column where the following details must be provided.
a) If the user wishes to create a decision driver of Entity type, input the following details.

Type: Choose whether the decision driver is of Entity or Attribute type.
Entity Type: Choose the applicable entity type from the drop-down list.
Entity: Choose the applicable entity for the entity type selected above.
Parent: Choose the applicable product under which the entity has been configured.
Operator: Choose the applicable operator function, i.e., AND or OR.
Actions: The user is provided the ability to delete the Decision Driver created.
b) If the user wishes to create a decision driver of Attribute type, input the following details.

Type: Choose whether the decision driver is of Entity or Attribute type.
Entity Type: Choose the applicable entity type from the drop-down list.
Entity: Choose the applicable entity for the entity type selected above.
Parent: Choose the applicable product under which the entity has been configured.
Attribute Type: Select the appropriate Attribute type from the drop-down.
Mapping Attribute:
Workspace: Choose the applicable workspace.
Change Events: Choose the specific change events from the workspace selected above.
Operator: Choose the applicable operator function, i.e., AND or OR.
Actions: The user is provided the ability to delete the Decision Driver created.
7. Click on Proceed to Builder to configure the Product Rule using the Algorithm builder.
-
Access the attribute against which `algorithm needs to be written from the left section. Double click to select an attribute.
-
Access the function library from the top of the algorithm builder.
-
Access the various rating steps or rate tables from the right side of the builder.
8. Once the configuration on the Algorithm Builder has been completed, click on Submit.
9. Navigate back to the Add Product Rule page and click on Save.